 We’ve all had those awesome bottles of wine that we always want to remember. Maybe it was a special occasion, or simply just a rock star bottle you enjoyed. If you have room (and an approving spouse) perhaps you keep the entire bottle. But I’ve always preferred to keep just the label and it’s fun to go back and flip through them all like a stack of baseball cards and think about where you were when you enjoyed the wine. Sometimes I will write notes on the back to offer even more detail.
But the hardest part is getting a good clean lift of the label without tearing it. I’ve tried many methods, and many label lift products, and I finally think I have it down to about a 90% success rate. Here’s how to do it…
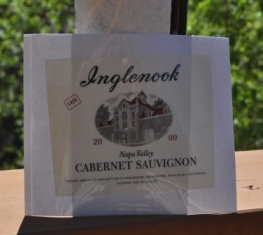
First, you will need to buy some label lifts. These are simple stickers that you peel off, put on the bottle to secure the label, and then put the backing back on to have a perfect finished product (like photo above). I have tried a lot of brands out there, but have found the best success using the Oenophilia Label Lifts which you can buy here on Amazon.com for $17 for a 50 pack. You can’t beat that price.
Next, take your finished bottle and fill it up with warm water, to at least the top of the label. This starts to loosen the glue on the back of the label. Let it sit for 30 seconds or so, then pour the water out.
Using the warm water that is probably still flowing from your faucet, run the bottle and the label (directly on the label) underneath the warm water for just 10-15 seconds. You don’t want to do too much or the label will absorb the water and tear more easily. You just want to get the label wet. After that, pad the label gently with a paper towel to just semi-dry it off. You still want it to be a little damp.
 After that remove the clear plastic part of the label lift (it should be sticky, don’t touch it because you want maximum stickiness without fingerprints) and be sure to hold on to the backing that you peel away. Starting an inch or two from one edge of the label slowly fold the clear plastic sticky film across the label. You want to roll it on so as to not generate any air bubbles.
This is the most important step because once you get started rolling the sticky film on, you cannot stop. Go slow. I like to press it down against the label as I go.
Once you get the film across the entire label, grab a spoon. Beginning on one edge of the label, begin to press the film down against the label using the spoon. The key here is to make sure that the film is secured evenly across the label, and you will want to use extra force (or even the edge of the spoon) to secure the parts around the edges and corners of the label. Once you start peeling the label off, the edges are where most tears will occur.
After you’ve done that, go back to all the edges of the label and press the film down again. You can’t have enough stickiness from the film around the edges.
You really don’t have to wait long for the sticky film to grab the label. I’d give it another 20 seconds and then begin slowly peeling the film off together with the label. Go super slow and if you see the label tear or not come fully off, press the film back down on that part of the label and rub the spoon across everything once again. You don’t get many second chances, but you can finagle it a bit.
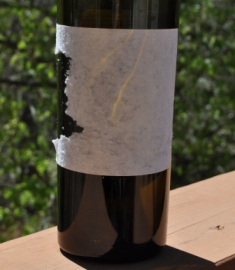
Sometimes the entire label and all glue will come off. Other times, you will be left with a little residual paper (such as my first photo above) which is totally fine. Once you put the backing back on the clear film with the label it should look perfect.
And that’s it. Super easy. And once you do two or three, you’ll get the hang of it fast.
Thanks as always for reading the site.
— Andrew, Editor